Experiment map
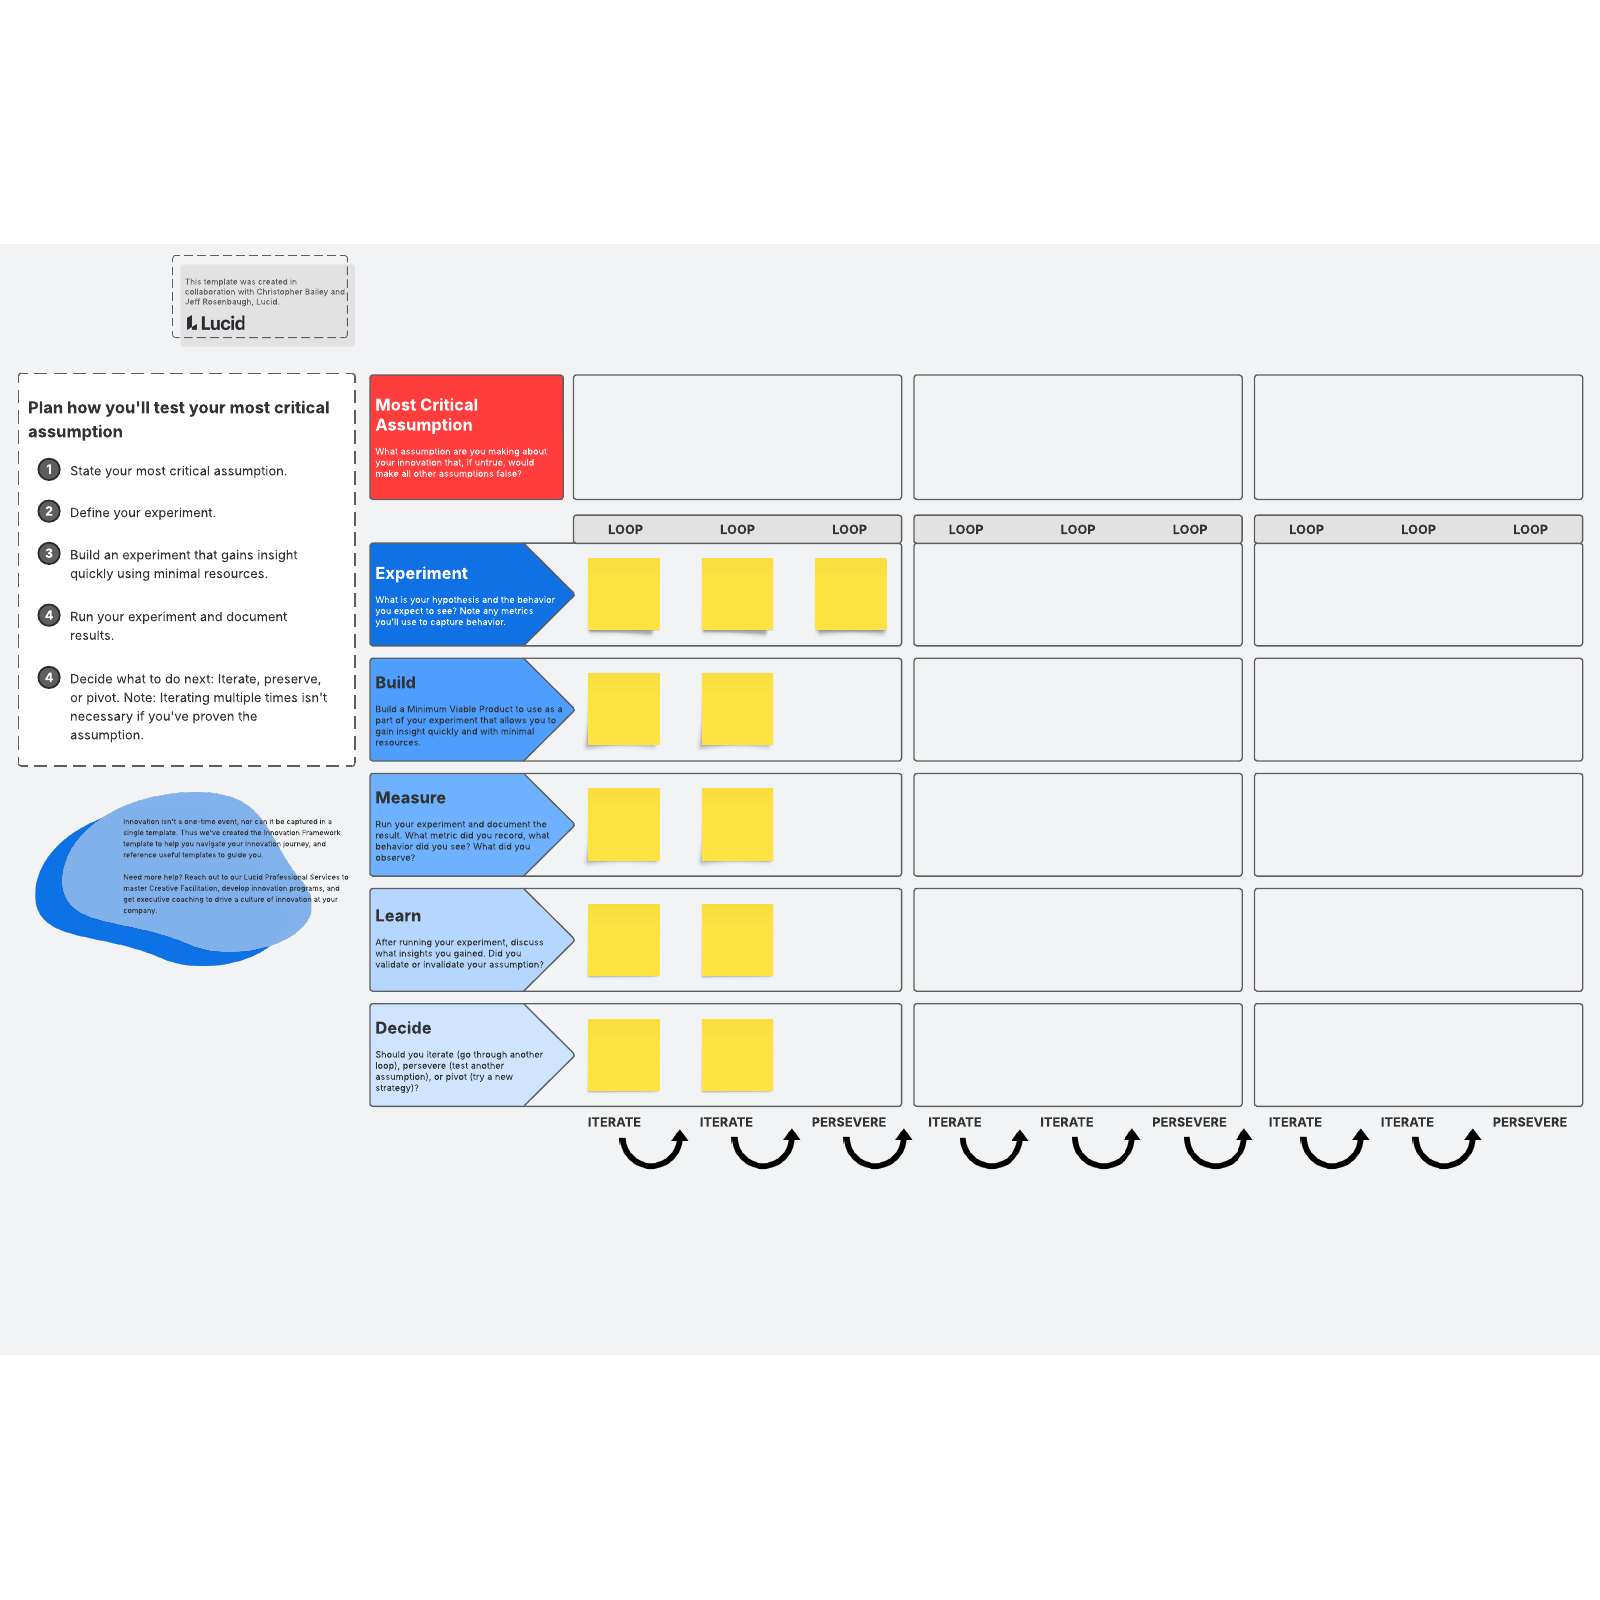
Test and validate your most critical assumption with this experiment map.
or continue with
By registering, you agree to our Terms of Service and you acknowledge that you have read and understand our Privacy Policy.

Use an experiment map to test your most critical innovative assumptions
Innovation starts with ideas, and all ideas contain assumptions. If you’re trying to develop a product or service, you likely have assumptions about how your innovations will add value to your product and how they will be received by consumers. If these assumptions are incorrect, you run the risk of wasting a lot of time and effort on innovations that won’t get the job done.
You can avoid this outcome with the help of an experiment map. As part of a build, measure, and learn cycle, an experiment map can help you streamline an experiment that tests your most critical assumption about your planned innovations.
Lucidspark’s experiment map template works best when you use the critical assumptions template to define your assumptions and the build and learn cards template to design a workable experiment.
After you determine what your most critical assumption is and build an effective experiment to test it, an experiment map helps you keep track of the different stages of your experiment, what you’ve learned, and any possible iterations of multiple follow-up experiments.
How to use the Lucidspark experiment map template
The experiment map template is easy to share and collaborate on with other team members and stakeholders, and you can use it to test more than one assumption at the same time. To use it, simply add it to your Lucidspark whiteboard and then:
- Add your most critical assumption(s) about your innovations to the top of the template.
- Define the experiment(s) you will use to test your assumption, including the hypothesis and the metrics you will use to test your hypothesis.
- Build a minimum viable product (MVP) that you can use in the testing. The MVP will function as a prototype of one or more of your planned innovations that will not require too many resources to create.
- Run your experiment and record and measure the results.
- Compare the results to your hypotheses and determine if your assumption has been proven or disproven.
- Decide whether you need to iterate, persevere, or pivot.
- You should iterate the same experiment if your assumption has been disproven and you want to see if you get the same results again.
- You should persevere if your hypothesis was proven correct. Keep your same goals in mind and go on to test another assumption.
- You should pivot if your assumption has been disproven, but you’ve gained some valuable insights and can improve the testing. Run the experiment again with some changes to see if you can get a more favorable result.
- If you need to run the experiment again, do so. Re-define your experiment and continue through the process again.
- Repeat the process for all assumptions.
As you adapt and take your assumptions through multiple loops of experiments, you’ll be able to refine your assumptions and create better innovations that have a greater chance of being popular with your customers.

Christopher Bailey & Jeff Rosenbaugh
Professional Services, Lucid


